You can use an in-house SMTP server to relay outbound email to your SocketLabs On-Demand account. This would enable you to queue outbound email locally if your connection to our service is unavailable
Using an intermediary relay between your applications and SocketLabs On-Demand service can be a great way to increase performance and reliability of your outbound email messages. It can be a hassle to develop custom applications that manage connections and queue messages in case of an ISP downtime.
You can set your application to transfer outbound messages over to a local IIS SMTP Server, which can then handle all the details of transferring the messages to SocketLabs for delivery.
Use the following link to set up your IIS SMTP Virtual Server:
How to: Install and Configure SMTP Virtual Servers in IIS 6.0 | Microsoft Docs
The screenshots and details provided are assuming IIS 6 Manger is installed – that includes users running IIS7.
Once you have everything set up with IIS you can follow these simple steps to set up the IIS SMTP relay to SocketLabs.
- In the IIS 6 Manager, right-click SMTP Virtual Server and select Properties
- (Optional) Check off the box to Enable logging.
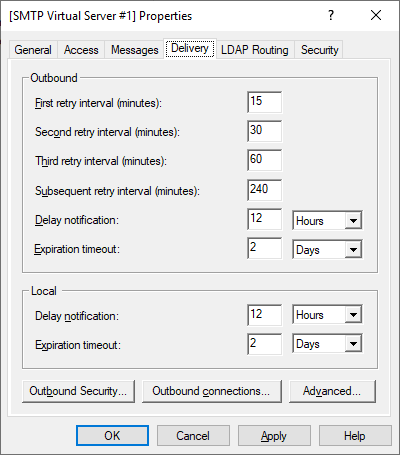
- Click on the Delivery tab and then click the Advanced button.
- In the Smart host text field enter your SocketLabs SMTP Server address provided on the SMTP Settings page of your SocketLabs On-Demand Control Panel account. Most customers will enter smtp.socketlabs.com in the field.
- Click “OK” to accept these settings.
- Now from the Delivery tab click Outbound Security.
- Select Basic authentication and enter in your SMTP Username and Password.
Note: This is not the same username and password used to log-in to the SocketLabs On-Demand Control Panel. Your welcome email will contain the instructions on obtaining your SMTP credentials.
- Check the box next to TLS encryption and click OK.
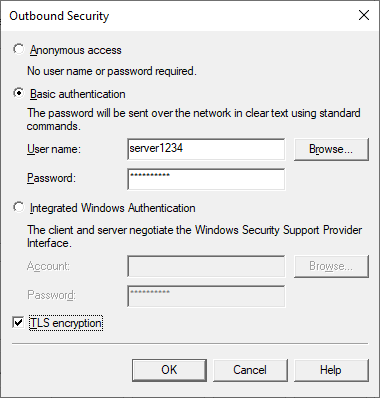
We recommend securing your relay by enabling authentication for your IIS SMTP Virtual Server and/or configuring relay restrictions.
- From the SMTP Virtual Server Properties click on the Access tab.
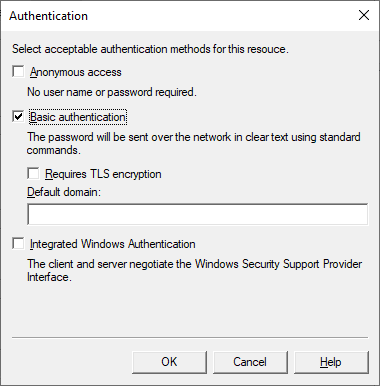
- Click on Authentication
- Check off the box for Basic authentication
- Dismiss the warning about Basic Authentication by clicking Yes.
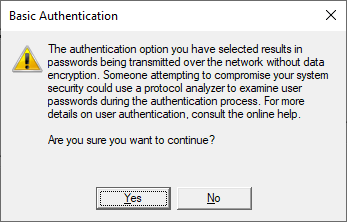
- Click OK
- Configure credentials by adding local users to windows
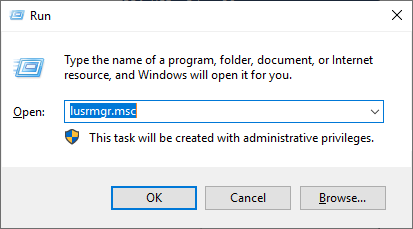
- Press 🪟 + R to bring up the Run dialogue and enter lsurmgr.msc
- Click OK.
- Right click the Users folder and click New User
- Enter in the User name and Password you would like to use.
- Uncheck User must change password at next login
- Check Password never expires
- Click Create

You have know created a local user to authenticate against your SMTP relay. Use this username and password in your applications instead of your SocketLabs SMTP Username and Password.


